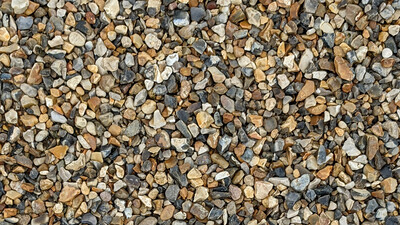
But one disadvantage is that being loose, they easily become dislodged or compacted. This can affect both their performance and appearance.
In this blog post, we look at how gravel grids solve many of the common problems associated with gravelled surfaces.
What is a gravel grid?
A gravel grid is a system of sturdy, interlocking plastic grid panels installed before a gravel path or drive is laid. Once the gravel has been poured over the grid and levelled off, the walls of the grid hold the stones in place and prevent lateral movement. This ensures the gravel settles evenly and prevents it from forming ruts or being washed or pushed away into surrounding areas.
Where are gravel grids used?
A gravel grid can be used with gravel or other loose aggregates for a wide variety of applications, although they are less suitable for high-traffic areas or places where heavy commercial vehicles are often used. Whether you are installing a level base for a garden shed or greenhouse, stabilising the soil on a slope or laying a driveway, gravel grids are quick, easy and inexpensive to install.
Gravel grids can also be used to create a stable, temporary base. If a geotextile membrane is placed under the gravel grid to prevent gravel from being absorbed into the subsoil, when the base is no longer required the gravel, grid and membrane can be simply removed and the ground restored to its original state.
Are gravel grids good for the environment?
Non-porous surfaces such as concrete, stone and paviors create an environmental problem by preventing rain and stormwater from being absorbed into the soil which can benefit plants. Instead, the water runs off the surface and into watercourses or storm drains, leading to flooding.
Gravel and other loose aggregates allow moisture to penetrate quickly into the subsoil, preventing flooding of the surface and maintaining good soil moisture levels. They also act as a barrier to evaporation during warmer, drier weather.
However, without a gravel grid, this performance can be soon impaired. As the gravel is compressed it becomes less porous, with vehicle tyres creating ruts that are more prone to flooding. By preventing the gravel layer from moving or compacting, a gravel grid helps to maintain a well-drained, even surface.
Although gravel grids are made of plastic this isn’t necessarily a bad thing for the environment. They are made from recycled content and when removed, can be easily separated from loose aggregate and recycled once again.
What are some other gravel grid benefits?
- A gravel grid reduces ongoing maintenance costs as the surface of the gravel doesn’t need to be regularly graded and levelled.
- A gravel grid can be used to create a strong, stable base for garden buildings without the cost and permanency of concrete.
- A gravel grid makes it easier to cross a gravelled area with wheelchairs, prams and high-heeled shoes.
- Decorative gravel is now widely used in landscaping design. A gravel grid makes the installation and maintenance of gravel gardens much easier and faster.
- Driveways that use a gravel grid are less prone to losing stones, so gravel doesn’t need to be replenished so frequently.
How is a gravel grid installed?
Installing a gravel grid is quite easy and the extra steps taken to do this properly reap dividends in the long term.
- Start by preparing the area. if this was formerly soil or grass, excavate the area so that once the grid has been installed it is restored to the required ground level. if installing over existing aggregate, make sure this is flat and compacted and remove any sharp stones.
- Lay a non-woven geotextile membrane over the entire area. This will allow water to seep through to the subsoil while preventing gravel from being absorbed into the sub-base and weeds from growing up through the gravel.
- Lay the gravel grid over the membrane, starting in one corner and tapping the interlocking panels together with a rubber mallet or similar.
- Start to fill the grid with gravel, taking care to avoid shifting the grid by applying the gravel too vigorously. Only crushed, angular gravel should be used at this stage. Rounded stones such as pea gravel or pebbles should only be added as a decorative final coat.
- Once the grid has been filled, rake across the surface and make sure all gaps have been filled. Gently compact the gravel using a hand roller or small wacker plate.
- Apply the finishing layer and use a brush or rake to remove any excess. To protect the grid against damage and allow for further settlement, ensure the gravel is higher than the grid.
We hope you have found this information helpful and interesting. If you have any further questions, you are always welcome to call the friendly team of drainage experts at Drainfast on 01420 555600 or email [email protected].
Also, look out for more articles in our ongoing series of blog posts, bringing you useful information, insights, guides and tips on all things drainage!

Written by
Vicki James
Sales & Marketing Coordinator
Vicki is a vital part of the marketing team; from reporting to copywriting, she ensures we complete projects on time.

