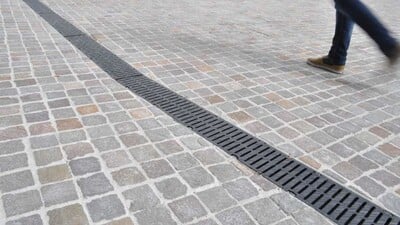
If you’re looking for some practical and helpful tips on how to install driveway drainage, you’ve come to the right place. In this post, we look at why driveway drainage is needed and what sorts of drainage channel materials are available, alongside step-by-step instructions on how to install your own driveway drainage channel. Remember, if you have any questions or require further guidance on the products you’ll need, you can get in contact with our experienced team.
Why are driveway drainage channels needed?
Most driveways are constructed so that they have a very slight slope; this allows any surface water such as rain or melted snow to run off the main part of the driveway, so it doesn’t flood. Driveway drainage channels are sometimes needed when additional drainage is required to remove the surface water from your property. You may have noticed these sorts of drains before, they are usually positioned at the bottom of a driveway before the pavement and are long and thin drains stretching the full width of the driveway. If your driveway has a slight camber, you may also need thin, brick-like channels which run down the sides, collecting the water, and directing it down to the drain at the end.
What different drainage channels are available?
Channel drainage systems are not just found on driveways, but you’ll have seen them in your local high street or similar places where there are walkways which need to be kept surface-water free. They’re also sometimes required indoors too for showers or wet rooms. You can get plastic, concrete, polymer concrete or metal drains, along with a variety of different types of grates too, including (but not limited to) plastic, ductile iron, cast iron, stainless steel, aluminium, and concrete/stone. These choices mean you can achieve the look you want, knowing that all options are suitable and durable enough to be used for drainage. If you want to know more about what the best drainage option is for your project, we’ve got some handy step by step tips on how to choose the right channel drainage.
Do I need planning permission to install a new driveway or a drainage channel?
If you’re planning to lay an entirely new driveway then there’s a small chance you may need to consider driveway legislation which has been in place since October 2008. So, what are the key facts to look out for?
You do not need to acquire planning permission if any of the below apply:
- Your new driveway will be less than five square metres in size.
- Your new driveway will be made of porous or permeable material (which allows surface water to soak through it).
- You will be directing any surface water to drainage channels or a soakaway system, so it doesn’t sit on the surface and run into the road.
If you’re concerned about what constitutes a porous or permeable material, for driveways, these include porous asphalt, gravel, vegetation of some kind, reinforced grass, permeable clay or concrete block paving. Where these materials do not require a drainage channel, things like asphalt, general concrete and clay block paving will – so don’t forget to plan in your drainage channels!
If you’re simply planning to install a drainage channel system to an existing driveway, you don’t need to worry about planning permission.
How to install a driveway drainage channel
We’ve put together the following steps to help you install a driveway drainage channel.
Step 1: Preparation
Preparation is key for this type of installation as you don’t want to be digging trenches in your driveway that you don’t need or fitting drains in the wrong places. Before starting out, make sure you know where you’re planning to install your drainage channel, what materials you’re using and, importantly, where the surface water will drain to. Unless you have a soakaway system, you’ll want the water to flow into the main drain. You’ll also want to check you have the right channel lengths ready for installation, and that any end caps are fitted prior to fitting the drainage into the ground.
Step 2: Dig your drainage channel trench
Depending on where you choose to place the drainage channel, you may need to provide an outer edge. This is possible using a length of timber secured with wooden pegs. When you dig or create the trench for the channel, you need to make sure it’s wide and deep enough to house the channel and the grate. We recommend digging a trench that’s around 2mm below the flooring that will surround the drain, but with an extra 100mm or so below to allow for the addition of concrete. Once you’ve dug the trench, you’ll want to make sure it’s nice and level ready for the channel, so add a layer of sand and concrete (around 100mm thick as previously mentioned) to the bottom of the trench and level off.
Step 3: Insert the drainage channel and grate
Now the ground is prepared and ready for the pipework, you can lay your drainage channel on top of the concrete and sand base. To make sure it’s secure, you can use a mallet or something similar to apply a little pressure to the channel to make sure it’s embedded properly, then pour more concrete into the trench around the drainage pipe. You can then place the grate on top to finish your driveway drainage channel.
If you need to source the parts for your driveway drainage channel, we stock a wide variety of drainage supplies.

Written by
Mark Chambers
Marketing Manager
As Marketing Manager, Mark plays an active role in running strategic projects to increase our brand profile.

