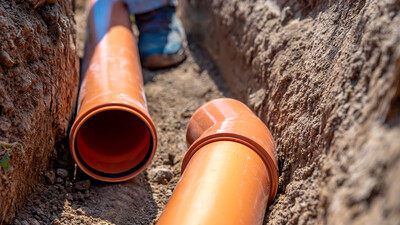
Having sufficient and effective drainage is an essential aspect of any building, whether that’s a small domestic home or a huge commercial building. You may have found this blog post whilst looking at how to repair or install a drainage pipe around your home, so we’re going to talk through some of the considerations you need to make when undertaking this task on a domestic property.
What sort of drainage pipe are you looking to install?
It will come as no surprise that there are multiple drainage solutions to every home, but the one we’re going to focus on for this post is how to install foul drainage – so this includes any wastewater that leaves the property – this comes from the kitchen/utility and bathroom.
How do I find drainage plans for my house?
First thing’s first, it’s a good idea to get your hands on the drainage plans for your house so that you can see where existing drainage is located. There are a number of routes you can take to find drainage plans:
- The previous owner may have a copy.
- Your neighbours may have a copy.
- Contact the local council.
- Contact the local water authority.
We know that a commonly asked question is whether house deeds show drainage, and unfortunately, in most cases, they don’t.
Installing different types of drainage pipes
In this next section, we’ll go through how you can install different types of foul water drainage pipes in your home so you can choose the option which best suits your needs. Remember, if you need any materials to complete the project, we stock a variety of drainage products that are purpose-built for foul drainage.
How to install a shower drain
The good news is, the integral drainage pipe which physically connects the foul water pipe to the sewers will already be in place from the original build of the house, so you don’t need to worry about taking the house apart. You will however want to make sure that your new shower drain connects properly to the foul drainage pipe, so you don’t get any leakage.
If you’re replacing a shower drain that is fitted in a shower tray (which lots are), then the easiest way to go about it is from underneath. This means you’ll have easy access to the waste pipe, and you can ensure that the fixture isn’t leaking before you put everything back together. It also means you don’t have to remove the entire shower tray in the process (although you can if you’d rather not repair the ceiling or part of the floor you’ve cut out instead).
You’ll need to purchase a shower trap body and outlet nut, which will include a dome, bowl, upper assembly and lower washer, plus you’ll ideally want a fixing tool to make sure everything is secured correctly.
Once you’ve removed the existing trap, you’ll need to position a rubber washer directly underneath the tray, followed by the trap body and the top washer. The upper assembly goes on top, above the shower tray. Make sure this is nice and secure. The bowl and dome can then simply sit in the upper assembly. You then need to place the plastic and rubber washers onto the waste pipe underneath and tighten the nut back onto the trap body. Test it to check for any leaks before patching up the ceiling or floor.
How to replace or install a toilet drainpipe
If you need to install a toilet drainpipe and have decided to do it yourself as opposed to getting a plumber in, we’ll talk you through some basic step-by-step instructions on how to do this to help you navigate through the process. We recommend you also explore video content in addition to this blog post to ensure you don’t cause any unnecessary damage to your home.
- Make sure the water supply is turned off and flush the existing toilet a few times to clear any excess water before removal.
- Carefully remove the existing toilet, if you’re planning to keep it, keep the nuts and bolts and place the toilet in a secure location where it won’t get damaged.
- Unscrew and remove the toilet flange (this connects the toilet to the pipes that lead to the sewer).
- Cut away the flooring which is positioned around the drainpipe so you can access the underneath of the floor. You can then reach inside and remove the curved pipe or ‘closet bend’. You can also remove any additional damaged pipes at this stage.
- Measure the space where you need to replace the pipes and cut the replacement pipe to fit. We recommend including an additional inch on the end so you can slot the pipe in successfully.
- Use joint cement to fit the new bend into the existing pipe, and twist and/or bolt together to make sure it’s nice and snug.
- You can then install the replacement part of the longer pipe, again using joint cement to fix, and this will connect to the existing pipe and the bend. Hold them together for a little while to allow for a water-tight seal. We also recommend running a little water through the pipe to make sure there are no leaks.
- You can then re-fix the toilet to the drainage. Start by re-attaching the flange back into the drain and secure it with screws before putting the toilet on top and re-bolting.
We hope you find these instructions useful, and that they help you with installing a drainage pipe for your particular home project. If you have any questions about our products, please feel free to get in contact - we’d be more than happy to help.

Written by
Mark Chambers
Marketing Manager
As Marketing Manager, Mark plays an active role in running strategic projects to increase our brand profile.

